

Appearance
Drone events
This page shows you how to fly the fleet: lift it off the Launch Pad, send it from one picture to the next, and bring it home. You do this with three kinds of clip: Takeoff, Track and Return.
A clip is a block on the timeline with a start and an end. A channel is one row of the timeline that holds clips. A formation is a picture in the sky, built as a Formation Group. A slot is one point of that picture that a drone will fly to. See the Glossary for the other terms.
Flight clips live on the Launch Pad's Drones 1 channel. Before the first clip the drones wait on their pad spots. After a clip ends they hold where they are until the next clip starts. They never fly anywhere you did not schedule.
Add a flight clip
- Select the Launch Pad in the Hierarchy panel. Its channels appear in the timeline.
- Right-click the Drones 1 lane at the time the clip should start.
- Choose Add Takeoff, Add Track, Add Return or Add Algorithm Bypass.
- Drag the clip to move it, or drag its left or right edge to change its length. A new clip is 4 s long.
Clips on one channel cannot overlap. Right-click a clip for Disable, Lock, Copy and Delete.
A typical flight plan is one Takeoff, one Track for each later picture, and one Return at the end. Add Algorithm Bypass has its own page: Algorithm Bypass.
Give a clip its formation
Takeoff and Track clips need a target. Return does not, because it always flies to the pad.
- In the Hierarchy panel, find the Formation Group the drones should fly to.
- Drag it onto the clip in the timeline.
- The clip title changes to Track: or Takeoff: followed by the group name.
Only a Formation Group is accepted. A single shape must be inside a group first, see Formations and groups. A Takeoff or Track clip with no formation is ignored. If you delete the group later, the title reads (missing).
How drones get assigned to slots
You do not choose which drone flies to which slot. For every clip the app matches drones to slots so that the total travel stays small and very long flights are avoided, which keeps paths from crossing.
- Each clip starts where the last one ended. The first clip starts from the pad. Later clips start from the previous formation.
- Drones stay on their slots. Once a drone arrives it follows its slot live. If the formation moves, rotates or changes shape, the drones go with it.
- More drones than slots: the extra drones get no slot and hold where they are.
- More slots than drones: some slots stay empty.
- Several Launch Pads, one formation: no slot is used twice. The clip that starts first takes its slots, and later clips share what is left.
- Pyro: slots that fire a pyro product are given drones that carry it. See Pyro and fireworks.
The match can change whenever you edit the show, so never plan around one specific drone number. During the bake, the routing then turns this plan into flight paths that keep drones apart. The live preview before a bake does not avoid collisions. Only the bake does.
A clip does not set the speed
Drones fly within the limits of the Launch Pad, whatever the clip length. At the default horizontal speed of 5 m/s, a 100 m flight needs at least 20 s. Make each clip long enough for the longest flight, then confirm it on the safety checks.
Track
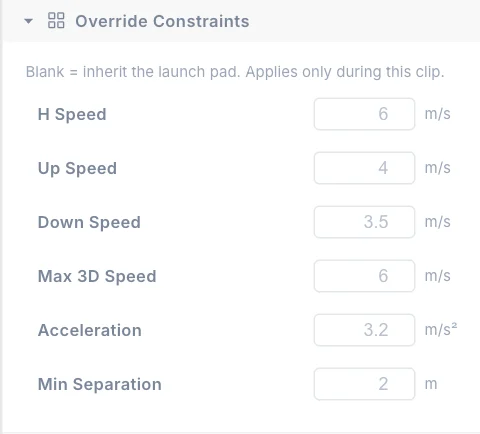
Track is the basic event: fly to this formation. It has two sections in the Properties panel: Colour in flight, and Override Constraints, described below.
Colour in flight
This setting decides which colour the drones show while they fly to the new formation. Colour clips on the Launch Pad still play over it.
- Keep current colours (the default): the drones keep the colours of the shape they are leaving, and take the new shape's colours when the clip ends. The audience can't guess the next shape from its colours, and a dark Launch Pad layer can fade in smoothly over the old colours.
- Dark: the drones are dark while they fly. Only Launch Pad colour clips light them.
- Crossfade: the colours blend from the old shape to the new one across the whole clip.
- Next shape's colours: the drones take the new shape's colours as soon as the clip starts. This gives the next shape away, so use it only when that is what you want.
The switch to the new shape happens at the end of the clip for every drone, in the preview and in the bake alike. Shows baked before this setting existed keep their old colours until you bake them again.
Takeoff
Takeoff works like Track and adds staged launch options. It is normally the first clip on the pad.
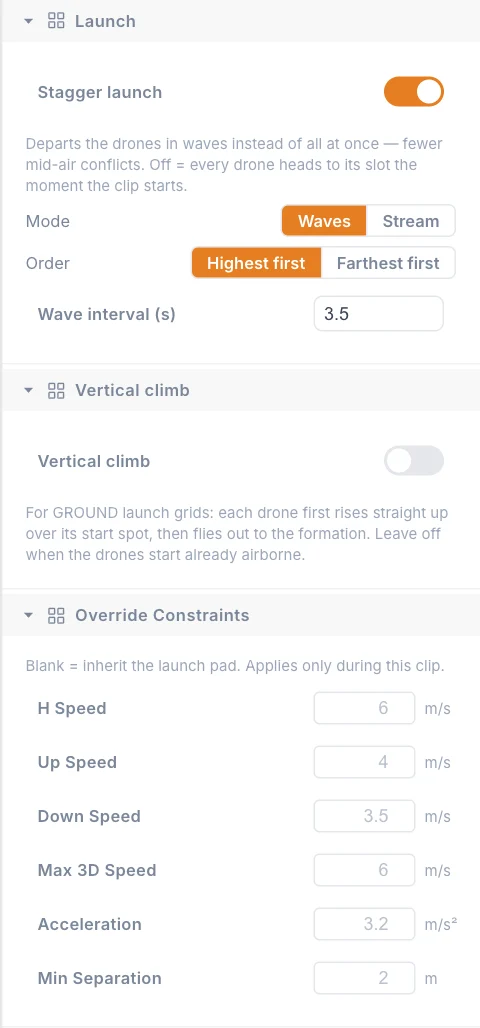
Launch
| Setting | What it does | Default |
|---|---|---|
| Stagger launch | Drones depart in groups instead of all at once, which means fewer conflicts in the air. Off: every drone heads for its slot the moment the clip starts. | On |
| Mode | Waves: a few separate groups, one every interval. Stream: a smooth, continuous flow with as many drones at once as the min separation allows, and no pulses. | Waves |
| Order | Highest first: drones going to the highest slots leave first, so the picture fills from the top and later drones never cross above waiting ones. Farthest first: drones with the longest trip leave first, so everyone arrives around the same time. | Highest first |
| Wave interval (s) | Time between two waves. Minimum 0.5. Shown for Waves only. | 3.5 |
Mode, Order and Wave interval (s) appear only while Stagger launch is on. Waiting drones hold their start spot. All departures fall inside the first 30% of the clip, and never take more than 15 s, in at most 8 waves.
Vertical climb
| Setting | What it does | Default |
|---|---|---|
| Vertical climb | Each drone first rises straight up over its start spot, then flies out to the formation. | Off |
| Takeoff altitude (m) | Height of that straight climb. Minimum 2. Shown while Vertical climb is on. | 10 |
Use Vertical climb when the launch grid is on the ground. Leave it off when the drones start already in the air.
Staging needs at least 12 s
On a Takeoff clip shorter than 12 s, Stagger launch and Vertical climb have no effect: every drone flies straight to its slot. The same 12 s rule applies to Progressive landing and Vertical landing on a Return clip.
This is a staged takeoff in the daytime example show:
Return
Return flies every drone back to the Launch Pad. It is normally the last clip. It needs no formation.
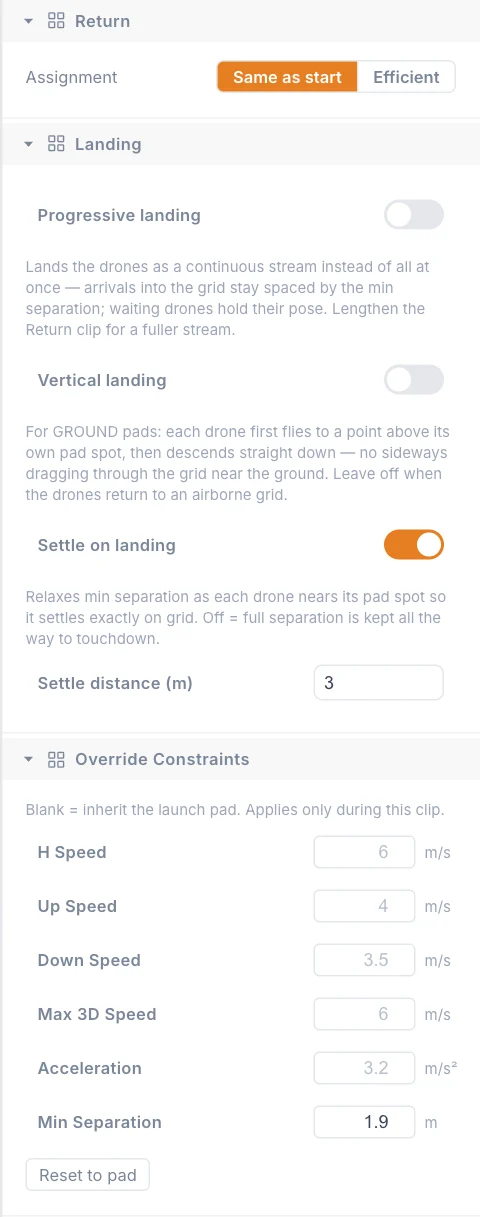
Return section
| Setting | What it does | Default |
|---|---|---|
| Assignment | Same as start: each drone returns to the exact pad spot it launched from. Efficient: each drone flies to the nearest free pad spot, for the shortest total travel. | Same as start |
Landing section
| Setting | What it does | Default |
|---|---|---|
| Progressive landing | Lands the drones as a continuous stream instead of all at once. Arrivals into the grid stay spaced by the min separation, and waiting drones hold their pose. | Off |
| Order | Lowest first: the lowest drones land first, so the picture peels away from the bottom. Farthest first: the farthest drones head home first, so everyone lands around the same time. Shown while Progressive landing is on. | Lowest first |
| Vertical landing | Each drone first flies to a point above its own pad spot, then descends straight down, with no sideways movement through the grid near the ground. | Off |
| Transit altitude (m) | Height of that point. Minimum 3. Shown while Vertical landing is on. | 12 |
| Settle on landing | Relaxes the min separation as each drone nears its pad spot, so it settles exactly on the grid. Off: full separation is kept all the way down. | On |
| Settle distance (m) | How close to the spot the relaxing starts. Minimum 0.1. Shown while Settle on landing is on. | 3 |
Use Vertical landing for pads on the ground. Leave it off when the drones return to a grid in the air. For a fuller Progressive landing, lengthen the Return clip: the stream can only use the time left over after the flight home.
During a Return, each drone keeps the colour its formation had when the previous clip ended. See Colours if you want them dark on the way home.
Override Constraints
Track, Takeoff and Return all have this section. It changes the flight limits from the start of this clip until the next drone clip. Leave a field blank to use the Launch Pad value, which shows as grey text in the field.
| Setting | Unit | Launch Pad default |
|---|---|---|
| H Speed | m/s | 5 |
| Up Speed | m/s | 3 |
| Down Speed | m/s | 2.5 |
| Max 3D Speed | m/s | 6 |
| Acceleration | m/s² | 3 |
| Min Separation | m | 2 |
Reset to pad appears once you set a value, and clears all of them. Use overrides to fly one transition slower or with more spacing. The defaults above belong to a new Launch Pad. You set your own under Flight in the Launch Pad properties.
Stay inside what your aircraft can do
Overrides are real flight limits. Never raise a speed or acceleration, or lower Min Separation, past what your drones and your site allow. See Flight limits and separation.
Tips
- Keep Stagger launch on and give Takeoff plenty of time. Long clips let waves spread out.
- Use Highest first for most formations and Farthest first when you want everyone to arrive together.
- Leave a gap between two Track clips if you want a picture to hold still for the audience.
Next
Make the formations move with Transforms and keyframes.