

Appearance
Images and SVG
On this page you will import a logo or drawing, turn it into drone shapes, or use a picture as a tracing reference.
An SVG is a drawing stored as curves rather than pixels, which is the best source for logos. A normal picture such as a PNG or JPG is made of pixels.
Imports all start from one dialog:
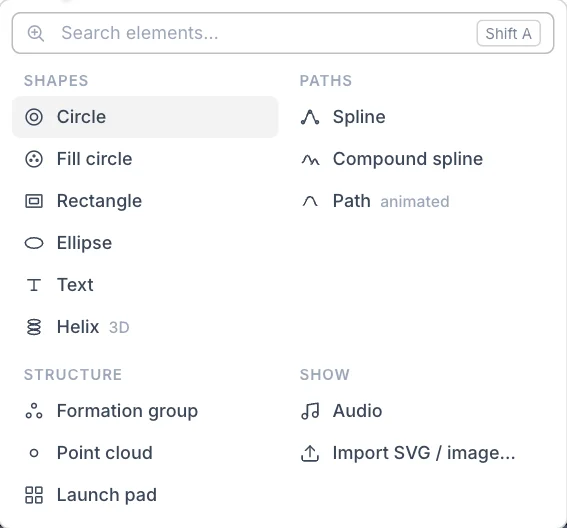
- Open the Add menu and choose Import SVG / image….
- In the Import dialog, click Choose file….
- Pick an SVG, PNG, JPG, GIF, BMP or WebP file.
- Set the options that appear, then click Import.
Import an SVG
An SVG shows a preview on the left and its options on the right. Import as: gives you two choices.
| Choice | Result | Drones? |
|---|---|---|
| Drone shapes | A Compound spline with one curve per path in the file. | Yes |
| SVG graphic | The drawing kept as it is, as a vector reference. See SVG graphic. | No |
Drone shapes
| Option | What it does | Default |
|---|---|---|
| Normalize size | Scales the artwork so its longest side matches the target value. Off treats each SVG unit as one metre. | On |
| target (m) | The size to scale to. Shown with Normalize size. | 30 |
| Center on origin | Moves the artwork's centre to the origin of the new element. | On |
| Color from | Copies each curve's colour from the SVG's Fill or Stroke. The default entry copies no colour. | Default |
Below the options is a list of curves. Each row shows its name, whether it is closed or open, and its length in metres.
Outline or fill
Each curve has its own placement:
- Outline spreads drones along the curve, for a line look.
- Fill packs the enclosed area with drones. It works only on closed curves, because an open curve has no area.
Closed curves start as Fill and open curves as Outline. Use Set all: with Outline or Fill to change every curve at once. Fill skips open curves. The preview updates as you choose.
After you click Import, select the new Compound spline and set Total drones. It starts at 50. Then drag it into a Formation group.
Filled letters or outlined letters
Solid logos usually read best as Fill. Thin lettering usually reads best as Outline, because a fill of a thin stroke leaves little room for drones.
SVG graphic
An SVG graphic stays sharp at any zoom and creates no drones. You see it mirrored from behind, like looking through glass. Use it as a reference, or to extract a clean centre line for drones.
| Setting | What it does | Default |
|---|---|---|
| Width (m) | Display width. Minimum 0.5. | 40 |
| Height | A read-out. It follows from the width and the artwork's proportions. | |
| Fills | Shows filled areas. | On |
| Strokes | Shows lines. | On |
| Centerline | Works out and shows the line running down the middle of each stroke. | Off |
| Per path | Works out the centre line for each path on its own, so paths that touch keep clean lines. Shown with Centerline. | Off |
| Smoothing | How much to smooth the centre line, from 0 to 10. Shown with Centerline. | 2 |
| Opacity | Fades the graphic, from 0.05 to 1. | 1 |
Turn a centre line into drones
This is the way to turn thick artwork into a single line of drones.
- Select the SVG graphic and turn on Centerline. Wait until
Computing centerline…disappears. - Adjust Smoothing until the line looks clean.
- Click Convert centerline to Spline. A new Compound spline appears in the Show.
If paths touch and their lines tangle, turn on Per path. Cut the artwork into separate paths first if needed, as described below.
Edit SVG
Select an SVG graphic and click Edit SVG at the top of the viewport. The toolbar shows how many paths the file has. Click a path in the viewport to select it. These tools change the SVG itself, not only the display.
| Toolbar button | What it does |
|---|---|
| Split | Cuts the selected path. See the steps below. Unavailable if the path's shape cannot be split. |
| Explode | Separates every stroke of the selected path into its own path. Needs a path with more than one stroke. |
| Delete | Removes the selected path. You can also press Delete. |
| Done | Leaves edit mode. You can also press Esc. |
To split a path:
- Select the path and click the split button.
- Click on the path to place each cut. The toolbar counts them.
- Click the check mark, or press Enter, to apply. To back out, click the undo arrow or press Esc.
To save the edited drawing, right-click the element in the Hierarchy and choose Export SVG.
Reference image planes
Importing a picture creates a reference image plane: the picture standing upright in the show, mirrored from behind like glass. It is a tracing guide only. The image is not processed, it creates no drones, and it plays no part in the bake.
| Setting | What it does | Default |
|---|---|---|
| Width (m) | Display width. Minimum 0.5. | 60 |
| Height | A read-out. It follows from the width and the picture's proportions. | |
| Opacity | Fades the picture behind your drones, from 0.05 to 1. | 1 |
From picture to drones
Importing a picture does not create drones. You trace it by hand.
- Import the picture and scale it to the size you want in the sky.
- Lower Opacity so you can see your points against it.
- Add a Point cloud and open Edit points.
- Use the add mode to click a drone onto each important spot of the drawing.
- Drag the Point cloud into a Formation group.
Image Point Cloud and the node graph
Older shows can contain an Image Point Cloud, where each surviving pixel of a picture became one drone, coloured from the image. You can still open and tune these, but imports no longer create them.
| Setting | What it does | Default |
|---|---|---|
| Points | A read-out of the current drone count. | |
| Operations | A read-out of the processing steps in order. | |
| Edit node graph… | Opens the Image Node Graph dialog. | |
| Cull spacing (m, 0=all) | Removes points closer than this to a kept one. | 0 |
In the dialog, each box is a step in a chain that runs from left to right:
| Node | Settings and defaults |
|---|---|
| Image Source | None. Always present. |
| Grayscale | None. |
| Threshold | Mode: Auto (OTSU) or Manual, default Auto (OTSU). Level: 0 to 255, default 128. Invert: default off. |
| Dot Mask | Spacing (px): default 8. Radius (px): default 1.5. |
| Output | Sample step (px): default 2. Normalize size: default on. Target size (m): default 30. Center on origin: default on. Always present. |
- Click + Add node to add a step, and drag from port to port to wire it in.
- Select a node to preview its result.
- Select a node and click Delete node to remove it. Image Source and Output cannot be removed.
Tips
- Clean your SVG before you import. Fewer curves give you fewer things to manage.
- Keep imported artwork simple. Fine detail disappears when a drawing becomes a few hundred lights.
- To see what a file contains before you commit, import it as SVG graphic and check its paths with Edit SVG.
Next
Learn the hand tools in Point clouds.