

Appearance
Designing good shows
This page helps you design a show people enjoy, not only one that flies. You will learn how big to draw, how long to hold a picture, and how to move between pictures in time with the music.
Numbers marked Rule of thumb are starting points, not limits. Test them against your site, your fleet and the rules that apply where you fly. For real limits see Flight limits and separation.
Start from where the audience stands
Everything depends on viewing distance, so decide that first.
- Select the Show element and look for its heading arrow. It points toward the audience.
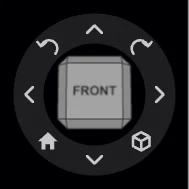
- Press the home button on the ViewCube ring. By default this places the camera 300 m out along that arrow, 10 m above the ground, which is a person's view from a crowd.
- If your audience is elsewhere, move the camera there.
- In the Environment settings, press Save current view as reset.
Design from that view. A shape that looks fine from a free camera in the air can fail from the ground.
Draw at a readable scale
Rule of thumb
Make the main picture 40% to 70% as wide as the audience is far away. At 300 m, that is 120 m to 210 m wide.
| What to check | Where | Example |
|---|---|---|
| Picture size | Formation group, Bounding box (W×D×H) | The second picture of the night show is a little over 200 m wide |
| Show height | Show element, Move Z | 40 m in the night show, 60 m in the day show |
| Top of the show | Safety tab, Altitude row | Compare with your permit |
Scaling a formation group is the quickest resize. In the night show, a scale of 1.4 turns an 18 m font into letters about 25 m tall.
Match slot spacing to drone count
Slot spacing is the distance between neighbouring dots. Too wide and a shape falls apart into dots. Too tight and the drones cannot fly it safely.
Estimate before you build:
- Outline: spacing is about the outline length divided by the drone count.
- Filled shape: spacing is about the square root of the area divided by the drone count.
| Shape | Drones | Spacing |
|---|---|---|
| Circle, radius 40 m | 100 | About 2.5 m |
| Rectangle, 96 m by 68 m, Grid | 150 | About 6.4 m by 6.8 m |
Rule of thumb
At night, keep outlines near 2.5 m to 4 m between dots so a line reads as a line. Filled areas can open up to about 7 m.
Min slot distance on a formation group must stay at or above the Launch Pad's Min separation, after all scaling. The default is 2 m. The Safety button turns amber as soon as you go under it, and red once you are more than 10% under.
If a shape is too big for your fleet, shrink it or simplify it. A smaller shape with a clear edge beats a large one that looks like scattered points.
Make text legible
Font size (m) is the height of a capital letter, in metres. Letter spacing (m) adds room between letters. Drones is an exact count, from 4 to 2000.
Rule of thumb
Make capital letters at least 1/20 of the viewing distance tall, so 15 m at 300 m. Allow at least 15 to 20 drones per letter.
Practical advice:
- Keep it short. BELLA ITALIA has 11 letters, about 25 m tall, on 200 drones. That is a little over 18 drones per letter.
- Use two lines with care. The night show title splits 225 drones between CASA TIMIS and GRAND TOUR, and makes the second line smaller.
- Give letters air. Letters that touch become a blur from a distance. Raise Letter spacing (m) before you add more drones.
- Stay near face-on. Text reads only from the front. The night show title turns 12 degrees each way, no more.
See Text and fonts.
Hold a shape long enough
People need time to notice a picture, read it and enjoy it. Moving on too early is the most common beginner mistake.
Rule of thumb
Hold a finished shape for at least 5 s, and text for longer. Add time for a word the audience does not expect.
| Picture in the night show | On screen |
|---|---|
| Title card | Colours arrive at 24 s, the Takeoff clip runs to 58 s |
| BELLA ITALIA | Letters finish at 80.75 s, the Track clip runs to 100.25 s |
| Italian flag | 51 s of animated path |
A long hold does not need to be still. Add Sparks, a slow turn on keyframes, or a motion effect to keep a held picture alive.
Pace to the music
Add the Audio element first, so you design to the track from the start. The clip shows a waveform, so loud moments are visible.
- Find the moment you want in the waveform and place the playhead there.
- Press Space to listen, and adjust with the Left and Right arrow keys, one frame at a time.
- Drag a clip edge toward the playhead. It snaps within 8 pixels.
Clips snap to a 0.25 s grid away from other targets. To work out a beat length, divide 60 by the tempo: at 120 beats per minute, a beat is 0.5 s.
Colour changes are instant, but flight is not. A shape cannot arrive on a beat unless its transition starts early enough. Time the colour to the beat, and let the flight finish before it. In the night show, the flag colours do not start until 10 s after the Track clip begins.
Plan transitions
A transition is the flight from one picture to the next. Baking routes it safely, but only you can give it enough time.
Rule of thumb
Take the longest distance any drone must fly, divide by Horizontal speed (m/s), then add 50%. A 60 m move at 6 m/s takes 10 s, so allow 15 s.
- Darken long moves. The night show fades a black pad clip in as the flag transition starts. A few sparks keep the sky alive.
- Stagger takeoff and landing. Use Stagger launch on Takeoff, and Progressive landing on Return.
- Bake early. Only the bake shows real routes. The preview and Safety numbers are estimates.
- Add seconds first. When a transition looks tense, more time usually fixes it. Raising limits is the last thing to try.
See Drone events.
Use colour with contrast
- Start from black. Colour reads best when it arrives. Clips light drones, and the default is off.
- Use a few colours. Two or three per picture is enough, and shapes stay clear.
- Separate parts by colour. The night show picks 66 slots each for green, white and red.
- Use Sparks at low strength. The night show uses 37% to 72% opacity. Full-strength sparks can hide the shape beneath.
Rule of thumb
Bright, saturated colours and white carry best over distance. Deep blue and purple look dimmer than they do on screen, so test them.
See Colours and Colour effects.
Face the audience
Shapes such as Rectangle and Text stand upright and face one way, so a show has a front.
- Turn the Show, not each shape. Rotating the Show element turns the whole performance together. The night show turns it 78 degrees.
- Turn the pad with it. A Launch Pad sits outside the Show, so rotate it separately. The night show uses the same 78 degrees for both.
- Work in Global axes. In Global mode, the transform axes follow the show's face.
- Audience on several sides? Avoid text. Use round or 3D shapes such as a Circle or Helix, and try the Spin motion effect.
Keep the audience outside the flight area
Decide audience position together with your safety distances, before you design. Your local rules and your operations plan come first. No design choice overrides them.
Tips
- Sketch the show as a list of pictures with times before you open the app.
- Watch the bake at 1× with the sound on, from your saved audience view.
- Study Bella Italia with its timeline open beside you.
Next
Designing for the day? Read Daytime shows. Ready to fly? Go to Safety checks.