

Appearance
Properties panel
The Properties panel on the right shows the settings of whatever you selected. After this page you can read its sections, use its number fields, position an element exactly, and add keyframes.
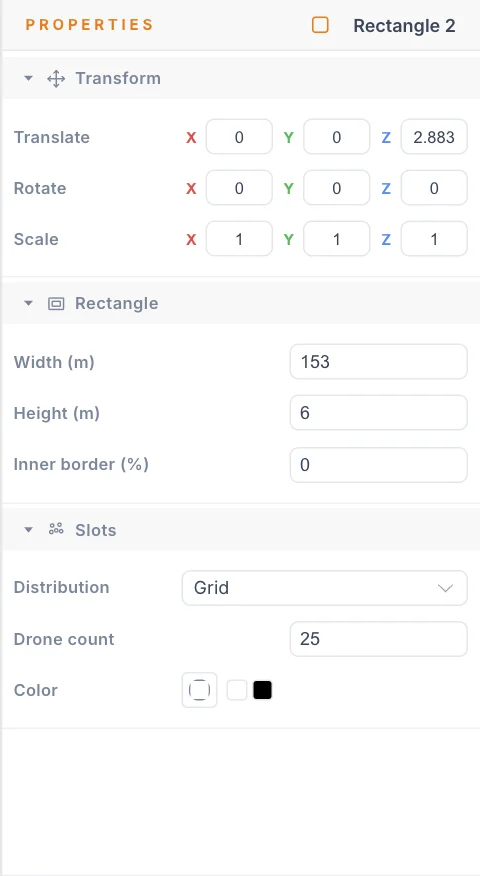
What it shows
| You select | The panel shows |
|---|---|
| Nothing | Nothing selected, with a hint. |
| One element | Its name, then its settings. |
| Several elements | A count such as 3 elements selected. Select one element to edit it. If the selection holds exactly one Formation group, its Color priority stays available here. |
| Environment in the top bar | The Origin, Map and Camera sections. |
| A clip in the Timeline | The clip's own settings, as a card below the element's sections. |
During bake playback the panel is replaced by Statistics, because a bake cannot be edited.
To rename the selected element, click its name at the top of the panel, type, and press Enter. Press Esc to cancel.
Sections
Settings are grouped into sections with a title bar. Click a title bar to collapse or expand that section. The panel remembers your choice for that kind of section.
Most elements start with Transform, followed by sections for that type:
| Element | Sections after Transform |
|---|---|
| Show | Color Palette |
| Launch Pad | Launch Pad, Grid, Pyro loadout, Flight, Ground |
| Rectangle | Rectangle, Slots |
Audio has no Transform section, because sound has no place in space. The other element types are covered on their own pages under Build the scene, starting with Show and Environment.
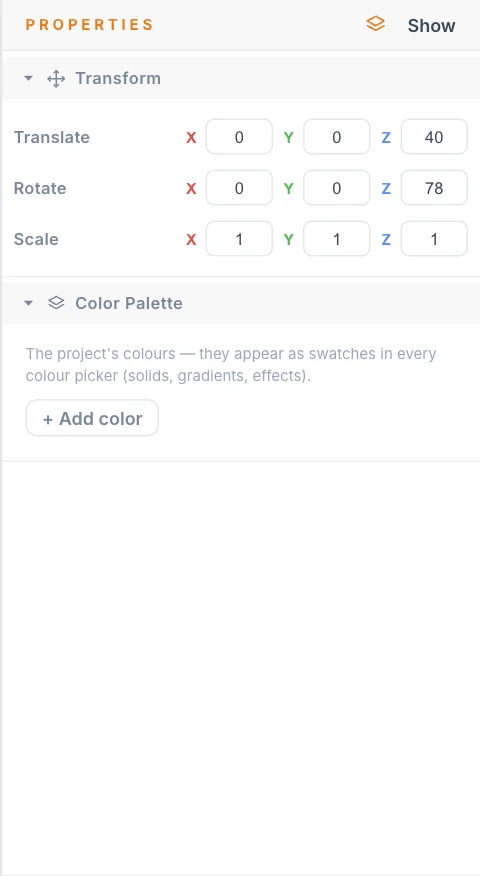
Number fields
Every number field works the same way.
- Click a field to select its whole value, then type to replace it.
- The change applies live as soon as the text is a complete number, so you see the result while typing.
- Press Enter or click elsewhere to finish. If the text is not a number, the field goes back to the last good value.
- Fields with a limit keep the value inside it. A field shows up to 3 decimals.
You can also change a number by dragging. Press the field's label, or the coloured X, Y or Z tag, and drag left or right. Hold Shift for steps ten times finer. The drag keeps working when the cursor reaches the edge of the screen.
Other field types
| Field | How to use it |
|---|---|
| Dropdown | Click and choose an option. |
| Switch | Click to turn on or off. |
| Text | Type directly. |
| Colour | Click the colour box to open a picker. The change is live while you drag. The swatches beside it are your project palette: click one to apply it. A tile with + adds the current colour to the palette. |
Transform section
The Transform section places the selected element.
| Row | What it sets | Drag step per pixel |
|---|---|---|
| Translate | Position in metres. | 0.1 |
| Rotate | Rotation in degrees. | 1 |
| Scale | Size, where 1 is the original size. | 0.01 |
| Pivot | The point that the element turns around, in metres, measured from the element. | 0.1 |
The Pivot row appears in Pivot mode, or once the pivot has been moved. It has two buttons:
- Centre places the pivot at the geometric centre of the selection.
- Reset returns the pivot to the element's origin.
In Pivot mode you can also drag the amber dot in the viewport. See Center and Pivot.
On the Show, this section moves and turns the whole design, including its heading.
Keyframes
A keyframe stores a value at one moment. Between two keyframes the value changes smoothly, which is how an element moves over time. Keyframes appear as diamonds on the element's Transform channel in the Timeline.
The Translate, Rotate and Scale rows change colour to show their state at the playhead:
| Field colour | Meaning | What typing does |
|---|---|---|
| Normal | Not animated. | Changes the base value. |
| Green | Animated, and the playhead is between keyframes. | Adds a keyframe at the playhead. |
| Yellow | The playhead is exactly on a keyframe. | Updates that keyframe. |
To add your first keyframe:
- Move the playhead to the moment you want.
- Set the value in Translate.
- Right-click the Translate row.
- Choose Insert Translate keyframe. The row turns yellow and a diamond appears on the Timeline.
- Move the playhead to a later moment.
- Type a new value. Because the property is now animated, this adds a second keyframe by itself.
The right-click menu offers these items, depending on the state at the playhead:
| Item | What it does |
|---|---|
| Insert Translate keyframe (or Rotate, Scale) | Adds a keyframe for this row. It reads Update when a keyframe is already there. |
| Insert Transform keyframe | Adds keyframes for all three rows at once. It reads Update when one is already there. |
| Delete Translate keyframe (or Rotate, Scale) | Removes this row's keyframe at the playhead. |
| Delete Transform keyframe | Removes all keyframes at the playhead. |
A locked Transform channel takes no new keyframes. A Launch Pad has no Transform channel, because it stands on the ground and cannot be animated. See Transforms and keyframes.
Tips
- Scrub the playhead and watch the Transform values update. They always show the animated value at the playhead.
- Collapse the sections you rarely use, so that the panel fits your screen.
Next
Arrange your show in time with the Timeline.