

Appearance
Daytime shows
This page explains what changes when you design for daylight. You will learn how to preview a day show, how to size it for smoke, and what to check before anything flies.
Regulations and licensed operators
Pyrotechnics on drones are regulated, and the rules differ by country and region. Check your local regulations before you plan a pyro show. A licensed pyro operator must handle loading, arming and firing. This page covers design only, and it does not replace their advice.
What changes in daylight
| Night | Day | |
|---|---|---|
| What the audience sees | LED points on a black sky | Smoke, and small dark or pale dots |
| LED colour | Vivid, and carries the picture | Hard to see, so it plays a supporting part |
| Main effect | Light clips | Ignite clips with smoke products |
| Picture lifetime | As long as the drones hold it | As long as the smoke lasts, even after drones leave |
| Weather impact | Mainly flight limits | Flight limits, and the wind also moves the picture |
LEDs still have a use. They help nearby viewers and cameras follow the fleet. Do not rely on them to draw a picture in sunlight.
Preview in daylight
- Click Environment in the top bar.
- In the Map section, turn on Daylight.
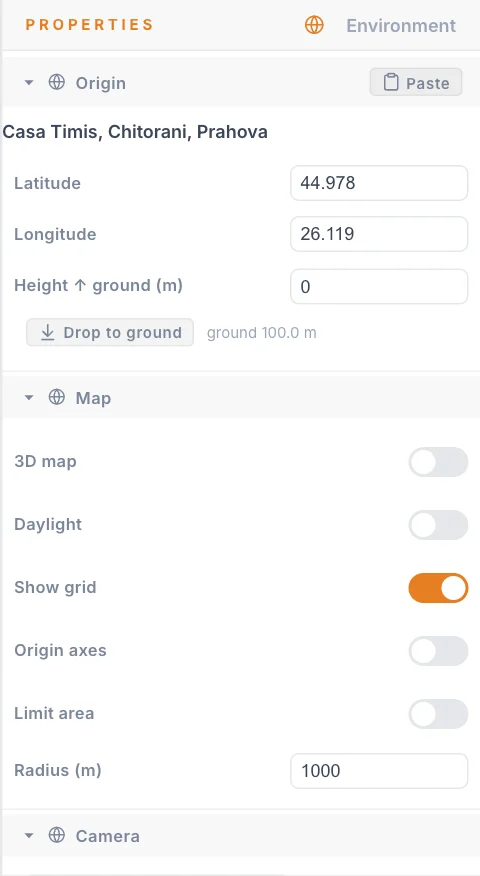
Daylight changes how the show looks. It does not change flight paths, and it is saved with the show.
| In the Daylight preview | Detail |
|---|---|
| Sky | A sky with light cloud and a late-morning sun |
| Map | Full brightness. The Time of day slider has no effect on it |
| Drones | Half size and 60% opacity, close to how a real drone dot looks by day |
The sun is fixed
The preview always uses the same sun position. It does not follow your date, time or location, so check the real sun direction for your show. See Show and Environment.
Size a formation for smoke
Smoke is a cloud, not a dot, so the spacing logic changes. In the preview each charge gives a brief flash, then strands fall about 4 m in about 2 s. They grow into a cloud about 3 m across that merges with its neighbours.
Rule of thumb
Start with slots about 6 m to 7 m apart. The BIAS 2026 show uses 150 slots on a 96 m by 68 m rectangle, about 6.4 m by 6.8 m apart. Ask your pyro operator how much your real product spreads, then adjust.
Also consider:
- Use simple, bold shapes. Fine detail does not survive in smoke. Bands and blocks do.
- Use a Grid distribution. Straight rows make clean bands and easy slot selections.
- Allow height. A burst falls below the point it fired from, so leave room under the lowest row. The BIAS show centres its 68 m tall picture at 60 m.
- Count charges. Each drone has three pyro channels, and each fires once.
Choose products and fire
The day workflow has three parts. Pyro and fireworks covers each one.
- Catalog: open the Pyro catalog in the top bar and add your real products, using the Airburst smoke type and a colour.
- Loadout: on the Launch Pad, set which drones carry what under Pyro loadout. Turn on Pyro loadout colors in the Viewport settings to see it on the grid.
- Ignite: add a Pyro channel to a formation, add an Ignite clip, then choose Product, slots and Timing.
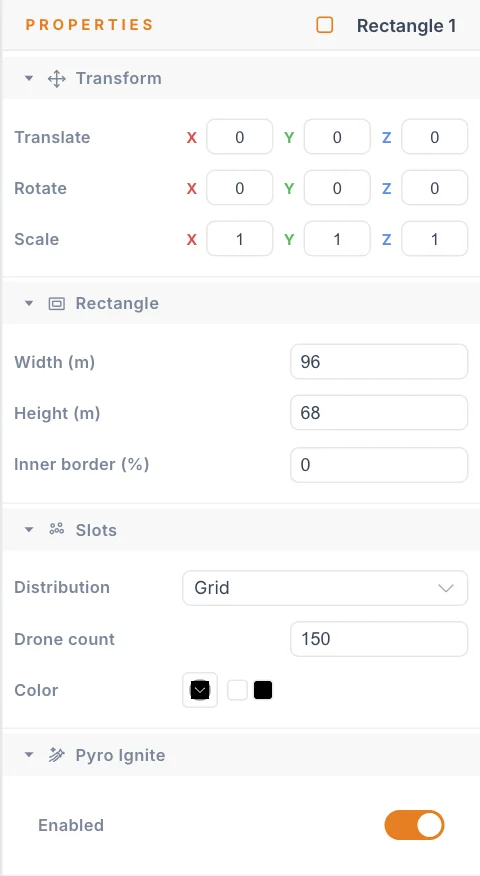
A smoke product stays visible for about 25 s in the preview. It leaves the drone at ignition, so the drones can fly away while the picture stays. A gerb (a fountain of sparks) is different: it stays on the drone and burns for about 5 s.
Think about contrast
Rule of thumb
A clear blue sky hides blue smoke, and a pale overcast sky hides white smoke. Strong warm colours usually stand out better. Try several colours in the preview, then confirm with your operator.
Use the Daylight preview to compare options, and remember that it is a stylised view, not a test of your real product.
Weather and wind
Wind matters more by day, because it moves the picture itself. These are general cautions. Your operator's flight limits and your pyro operator's limits decide what happens on the day.
- Wind moves the smoke. The picture drifts and stretches. Heavy wind can break it apart quickly.
- The preview is not a forecast. It adds a small built-in breeze for looks, and it does not use your site's wind.
- Think about where it drifts. Smoke and burnt debris should not travel toward the audience, roads or buildings.
- Plan for a cancelled show. Agree limits for wind, rain and visibility with your team in advance.
- Allow for moisture and sun. Rain and bright backlight both change how a picture looks.
Do not fly outside limits
Never fly or fire outside the limits set by your drone operations plan, your pyro operator or your local rules, whatever the design or schedule says.
Check the pyro report
The pyro report is a PDF for the crew. Build it from the final bake.
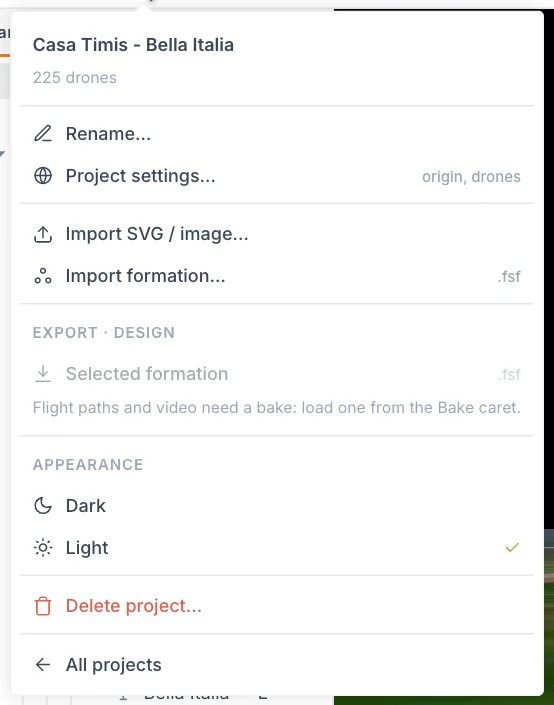
- Bake the show and keep the bake loaded.
- Click the project name in the top bar to open the project menu.
- Choose Pyro report. It opens as a print-ready page.
- Save it as a PDF from the print dialog.
Check these parts:
| Part of the report | What to check |
|---|---|
| Show summary | Drones total and Pyro-equipped drones match your plan |
| Product stock | Total charges matches the slots you fire. BIAS: 150 |
| Product data sheet | The products are the ones your operator actually has |
| Placement grid and table | Each launch spot shows the right product and ignition time |
| Sign-off | Your team signs here |
Then export the FSP flight files. If the export warns that a pyro ignition was skipped, no drone was within 2.5 m of that slot at ignition, or the ignition fell outside the trim window. Fix that and bake again. Do not fly a show with skipped ignitions you cannot explain.
See Pyro report for the details.
Tips
- Start the Return clip soon after ignition. The smoke stays and the drones get out of the picture.
- Keep the first day show small: one shape, one sweep, one colour for each band.
- Ask your pyro operator to review the report before you finalise the timing.
Next
Follow a full example in BIAS 2026, or read Pyro and fireworks.