

Appearance
Colours
This page shows you how to light the drones: choose a colour, decide which drones get it and for how long, and control which colour wins when several overlap.
Drones are dark by default
A new shape has a black Color field in its properties, which means the drone lights are off. A drone shows a colour only while a colour clip lights it, or when its element carries a colour of its own. You can set that Color field for a fixed colour, and images, point clouds and paths can bring colours with them.
When a colour clip ends, its slots go back to the colour beneath, which is usually dark. So nothing stays lit by accident, and takeoff needs no black clips.
A slot is one point of a shape that a drone will fly to. You colour slots, and the drone flying each slot takes its colour.
Add colour to an element
- Select one element in the Hierarchy panel.
- In the timeline, click the + button (Add channel) and choose Colors. A lane called Colors 1 appears.
- Right-click the lane at the time the colour should start.
- Choose Add Solid, Add Gradient or Add Sparks.
- Click the clip and set it up in the Properties panel.
- Drag the clip to move it, or drag an edge to change its length. A new clip is 4 s long.
A new colour clip covers all the slots of the element. A new Solid starts with the average colour of those slots, or white when they are dark. Sources on one channel cannot overlap, so add a second channel when two colours should run at the same time.
The same menu offers Add Adjust, explained in Colours Manipulator, and the five effects in Colour effects. If an element has many channels, the All, Transform and Colors filter next to the + button keeps the list short.
Solid
Solid paints one constant colour.
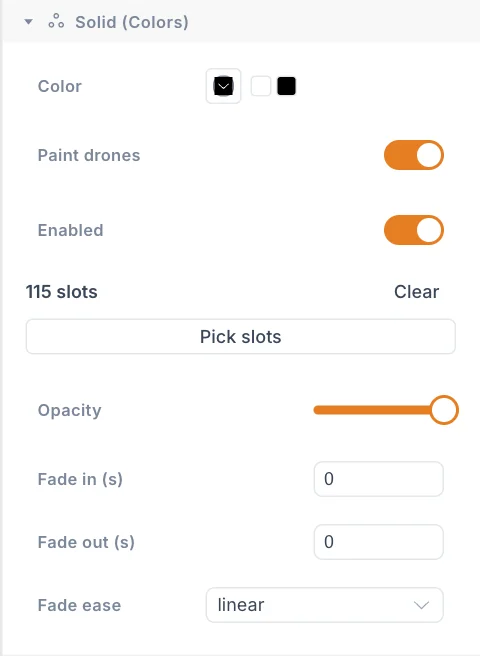
| Setting | What it does | Default |
|---|---|---|
| Color | The colour of the selected slots. | White on dark slots, see above |
Gradient
Gradient paints a blend of colours across the slots.
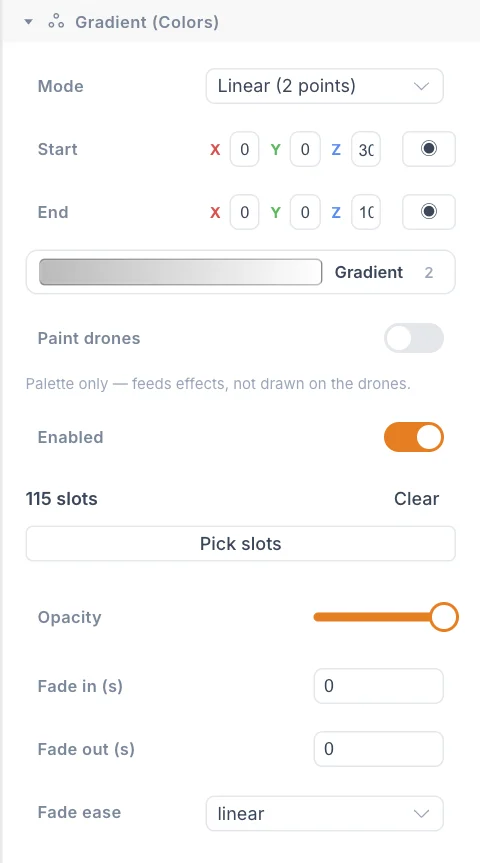
| Setting | What it does | Default |
|---|---|---|
| Mode | By slot order: the blend follows the order of the slots. Linear (2 points): it runs along a line. Radial (from centre): it spreads out from a point. | Linear (2 points) |
| Start, End | Ends of the line in Linear (2 points) mode, in metres. | (0, 0, 0) and (10, 0, 0) |
| Centre | Middle point in Radial (from centre) mode, in metres. | (0, 0, 0) |
| Radius (m) | Size of the circle in Radial (from centre) mode. Minimum 0.1. | 10 |
| Gradient swatch | Opens the colour editor. | Black to white |
In the colour editor, drag a stop to move it, click an empty spot on the bar to add one, and click a stop to change its colour. A gradient keeps at least two stops.
Click the ◉ button next to a point to get a sphere in the viewport, and drag it into place. This is easier than typing numbers. Points are measured in the element's own metres, so they stay correct when you move or rotate it. Slots past the end of the line or outside the radius take the last colour.
Stretch the line
The default line is only 10 m long. On a large formation most slots lie past its end and take a single colour. Drag Start and End to opposite edges of the shape first.
Sparks
Sparks makes random slots flash toward a colour, like glitter.
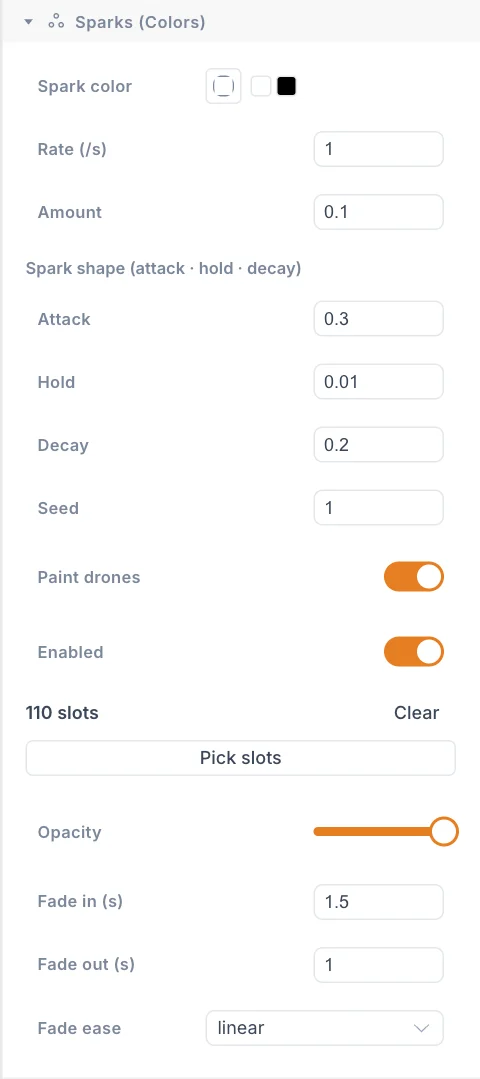
| Setting | What it does | Default |
|---|---|---|
| Spark color | The colour of each flash. | White |
| Rate (/s) | How often a slot can flash, per second. Minimum 0.1. | 3 |
| Amount | Share of the selected slots flashing at any moment, 0 to 1. | 0.15 |
| Attack | How much of a flash is the rise. 0 to 1. | 0.3 |
| Hold | How much of a flash stays at full colour. 0 to 1. | 0.1 |
| Decay | How much of a flash is the fall. 0 to 1. | 0.6 |
| Seed | Picks the random pattern. The same number always gives the same flashes. | 1 |
Between flashes the slot shows the colour beneath, so put Sparks on a lane above a Solid or a Gradient. Values near 0 for Attack and Decay give crisp pops. Larger values give soft pulses.
Settings every colour clip shares
| Setting | What it does | Default |
|---|---|---|
| Enabled | Off: the clip does nothing, and stays on the timeline. | On |
| Opacity | How strongly the clip covers the colour beneath, 0 to 100%. | 100% |
| Fade in (s) | Time to fade the clip in. | 0 |
| Fade out (s) | Time to fade the clip out. | 0 |
| Fade ease | Shape of both fades, from linear to inOutExpo. | linear |
| Paint drones | Off: the clip paints nothing and only feeds an effect. See palette sources. | On |
Fades show as wedges at the ends of the clip on the timeline.
Choose the slots
By default a clip covers every slot. To colour only part of a shape:
- Choose the Slots view in the top bar so you can see the slots.
- Click the clip, then click Pick slots in its settings.
- Click a slot to add or remove it.
- Hold Shift and drag a box to add many. Hold Alt and drag to remove many.
- Click Done picking.
The count above the button shows how many slots are selected. Clear empties the selection, and a clip with no slots paints nothing.
Which colour wins
Colours stack from bottom to top. Each layer covers the one beneath, according to its opacity and fades.
- The element's own colour is at the bottom.
- Channels on one element come next. The top lane wins. To change the order, right-click a channel name and choose Move up (front) or Move down (back). Each click passes one lane of any kind, so passing a Transform lane may take an extra click.
- Clips in one channel apply in order of their start time.
- Group and children: select a Formation Group and set Color priority. With Group, the default, the group's own clips paint over its children. With Children, the children's colours show through the group's fill.
- Launch Pad colours are always on top.
If a colour does not show, a layer above it is covering it. The usual cause is a Solid on a group hiding a child, which Color priority set to Children fixes.
Launch Pad colours for the whole fleet
A formation's colours belong to that formation and stop when the drones leave it. To colour drones across several Track clips, put the colour on the Launch Pad.
- Select the Launch Pad.
- Click + (Add channel) and choose Colors.
- Right-click the lane and add a clip, then drag it across the Track clips it should span.
These clips always cover the whole fleet. The settings show All followed by the number of drones instead of Pick slots, and the clip title ends in all drones. The bake can change which drone flies which slot, so a hand-picked group of drones would not stay the same.
To shape a Launch Pad colour, use a position-based tool such as Gradient or an effect. It works from each drone's live position as it flies, so a Gradient on a pad stays fixed in the sky while the drones pass through it.
During a Return clip, drones keep the colour their formation had when the previous clip ended. To bring them home dark, add a Launch Pad Solid set to black over the Return clip.
This is colour work on a formation in the night example:
Tips
- Use the top lane for accents and a lower lane for the base colour.
- Add a short Fade in (s) and Fade out (s). Colours that snap on look harsh in the sky.
- Copy a clip with right-click Copy, then right-click a matching lane and choose Paste event. A pasted colour clip covers all slots of its new element.
Next
Animate the light with Colour effects.